Administration Guide
Preface
This document describes the system administration functionality that can be performed to manage an OVD farm using the OVD Administration Console.
Introduction
Inuvika OVD provides a software platform for Microsoft Windows and Linux application and desktop virtualization. The software supports most server virtualization environments as well as brand named enterprise-level servers. The product delivers Linux and/or Windows hosted resources over any network to any device that is HTML5 capable.
This document describes how to configure and administer an OVD farm and focuses on the OVD Administration Console.
Inuvika OVD architecture and components
An overview of the OVD system architecture is provided in the Architecture Overview and System Requirements document.
OVD Administration Console Overview
Inuvika OVD provides an OVD Administration Console (OAC) component that should be installed on one of the OVD Linux farm servers. The component is normally deployed with the OSM on the OSM server. The OVD Administration Console component provides a web-based administration console to configure the OVD farm. An API is also provided that can be used to automate all or part of the OVD administration process. For further details, please refer to the Administration API Guide. The credentials required to access the OVD Administration Console or use the API are created during the installation process. The Administration Console presents a number of different top level sections identified by icons in a ribbon at the top of the page. Each section groups related administrative tasks together that will be described in the following chapters.
Accessing the OVD Administration Console
The OVD Administration Console can be accessed using a web browser and
entering the URL containing the domain of server hosting the
administration console followed by the path /ovd/admin. The protocol
used to access the administration console may be either HTTP or HTTPS
depending on how the component was configured. The user will be required
to authenticate themself using the credentials that were created during
the installation process.
http(s)://admin_console_domain/ovd/admin
Access policies
The Inuvika OVD authorization model is based on Role-Based Access Control (RBAC) which is used to restrict system access to authorized users.
Within OVD, three levels of administration are defined: - The Global Administrators who can manage the whole system and access everything. - The Organization Administrators who can only manage one or more organizations, defined by the administrators. They can fully manage that organization without restrictions. - The Policy-based Administrators who are regular users with granted granular permissions, like the right to create and manage in-session messages to create announcements. They won't be able to do anything not specifically authorized by their upper-level administrators.
A policy, which consists of a set of permissions, is defined and can be applied to a user group. Each policy enables access to a set of resources within the OVD Session Manager, such as users, groups, servers, settings, etc.
Some permissions are read-only access to audit the system, others allow the creation or changing of the resources (e.g. add or manage users). In Inuvika OVD, a special permission named ManagePolicies enables administrators to grant or revoke permissions for others. Administrators who have this permission can also limit their access by opting out of a policy. However, they cannot assign a policy to someone else if they themselves do not have it, adhering to the principles of Role-Based Access Control (RBAC).
OAC home page
After successful authentication, the user is presented with the OAC home page. This page displays a snapshot summary of the status of the whole OVD farm, shortcut links to many of the other areas of the administration console, and a set of icons at the top of the page that group related administrative actions. The actions presented on this page in the System area impact the entire OVD farm, not just the server hosting the console. Here the administrator can Switch the system to maintenance mode or Switch the system to production mode to change the operating mode of the OVD farm. If the OVD farm is in maintenance mode, new sessions are prevented from starting but existing sessions will continue to work. No major maintenance work should be started until all user sessions have terminated.
System
The System tab includes configuration and management options for the OVD system specifics.
Tenant Administration
The tenant administration tab holds the settings configurations to enable and add tenants. If multi tenant mode is not enabled, there is a button to activate it. If multi tenant mode is activated, it provides the form for managing tenants. The tenant management table includes:
- The Name and Description of each tenant.
- The Domain which is how users of this tenant will log in. A user for a tenant with this unique domain will enter his or her username followed by the "@" symbol followed by the domain to log in. The default tenant may not need a domain, in which case users for this tenant do not use a domain to log in.
- The Maximum concurrent sessions, which denotes the maximum number of sessions that can be active at once for this tenant.
- The Manage button, which goes into the management page for that tenant
- The Add/Remove from default button which adds or removes a tenant from being the default tenant. Only one tenant can be the default tenant at a time.
The Back To Global View button returns the administrator to the global view.
The page also includes the Add Tenant form to quickly add a new tenant by providing:
- The name of the new tenant
- The domain of the new tenant
Finally, if you have only one tenant you can turn off multi tenant mode by clicking the Deactivate Multi-Tenant Mode button.
For more details on multi tenancy, consult the Multi-Tenant Guide
Tenant Administration Properties
By clicking on the Manage button for a tenant, you are directed to the tenant’s management page. This allows you to modify the tenant in the following ways:
- Name: change the display name of the tenant.
- Description: change the description of the tenant.
- Domain: change the domain users use to log in with. A user for a tenant with this unique domain will enter his or her user name followed by the "@" symbol followed by the domain to log in.
- Maximum concurrent sessions: change this to change the maximum number of sessions that may be active at one time under this tenant.
Once you have made your modifications, press the Modify button to confirm them. You can also define this tenant as the default tenant with the Define as default button. To add or remove servers you have available to/from this tenant, use the Remove this server/Add this server buttons in the List of servers available to this tenant section. Finally, the delete this tenant button allows you to permanently remove this tenant.
System Settings
This section lists the system settings and briefly describes their purpose.
General Configuration
- System in maintenance mode: by default, this value is no. If set to yes, the whole OVD farm will be set into maintenance mode. Before upgrading the OVD system or software, the system must be put into maintenance mode and the system administrator should ensure that there are no active sessions by checking the system status.
- Administration Console language: by default, the value is set to autodetect. The autodetect setting uses the language setting of the browser that is being used to access the administration console. The administration console is available in multiple languages. If you would like to add another language, please contact Inuvika.
-
Debug options list: by default, the setting is set to info, warning, error and critical. For more detailed information, Inuvika support may request that the debug setting is also included. This setting determines the level of detail in the log files.
-
Maximum items per page: The display of some items in the Administration Console and also the API is limited to the number specified for this setting. Once the limit has been reached, a filer must be used to view the records required. By default, the value is set to 15.
- Administrator Support Contact: Email or URL for end-users to contact the support. Defaults to https://support.inuvika.com.
- Days to license expiry: Defines the number of days before a software license expires (by default 10) that OVD should generate a license expiry notification and alert.
Email Settings
These settings are used to configure OVD to send email notifications via an SMTP service. Choosing the Local setting means that an SMTP service must be installed and running on the OSM server machine. The system administrator is responsible for making installing and configuring the SMTP service in this case since OVD does not provide an SMTP. In this configuration, the from email address that should be used when sending an email can be set. If an external SMTP server is selected, then the following information can be provided so that emails can be sent through that service:
- From: by default, it is set to
no-reply@127.0.0.1. - Host: the SMTP server IP/FQDN.
- Port: 25 by default.
- Use SSL with SMTP: by default, set to no. If set to yes, the Port number must be changed accordingly.
- Authentication: no by default. If authentication is required, then the username and password must be specified.
- SMTP username: if authentication is required.
- SMTP password: if authentication is required.
Warning
In addition, the Notifications tab of the System section must be configured in order for OVD to send the required alerts
Data Management Settings
These settings are used to manage reporting data and cached logs. This section is mainly used to control how often reporting data is deleted to prevent it from growing infinitely and impacting performance of the database, as well as to control how often cached logs are updated:
- Auto-purge server reports: 2 weeks by default.
- Auto-purge session reports: 2 weeks by default.
- Auto-purge application usage: 2 weeks by default.
- Cached logs update interval: 30 seconds by default.
- Cached logs expiry time: 1 year by default.
Warning
Reporting data older than the auto-purge time limit set in these settings is deleted daily, so be sure to backup any data you do not want to lose, or set the auto-purge limit to be longer.
Client Customization
This section allows customization of the logos and colors for the OVD clients and Administration console.
Note
This tab is not available when the administrator has both enabled Multi-Tenancy and is in the global view. To regain access to this tab, the administrator must select a tenant.
Warning
If Multi-Tenant is enabled, please ensure each tenant has a unique access point for their users to access OVD with as Client Customization are applied for each unique tenant based on the access URL.
This means every domain's users should have a unique address/FQDN they use
to access OVD. For example, user1@testdomain.org and
user1@testdomainTWO.org do not use the same address to access OVD.
Instead, testdomain.org and testdomainTWO.org, have different access
points for their respective users.
OVD version restrictions
This section is not available for OVD versions prior to 3.3.
- Enable Custom Branding: Activate the branding customization for this tenant.
- Title: The window title, or web page title override for the tenant. If left blank, the default Inuvika title is used.
- Website URL: The URL pointing to the tenant's website. Used in about boxes for general-purpose website. Defaults to https://www.inuvika.com. For a Support URL or e-mail, use Administrator Support Contact in System Settings.
- Logo: A JPEG or PNG image used as the tenant's full logo. This image is always displayed on a white or almost white background. It's recommended to use a PNG image with a transparent background and a resolution between 100x100 and 600x600 for better results. The image can be squared horizontally. Bigger images are accepted too, but while the quality won't increase, the time to display it on end-user's device will increase.
- Icon: A JPEG or PNG image used as the tenant's icon or favicon. This image is always displayed on a white or almost white background onside OVD, but not on Web browser tabs or bookmarks. It's recommended to use a PNG image with a transparent background and a resolution between 32x32 and 512x512 for better results. The image shall be square. Bigger images are accepted too, but while the quality won't increase, the time to display it on end-user's device will increase.
- Primary Color: The color displayed most frequently across the OVD clients to create contrast between the different elements on the user interface.
- Allow Dark Mode: Allow the OVD clients to use a dark mode when the operating system supports it and the user enabled system-wide dark mode. The following settings will apply if enabled.
- Dark Mode Logo: Same as the Logo, but always displayed on a black or almost black background. If not set, the Logo will be used with a white padding.
- Dark Mode Icon: Same as the Icon, but always displayed on a black or almost black background. If not set, the Icon will be used with a white padding.
- Dark Mode Primary Color: Replaces the Primary Color when the Operating System dark mode is enabled.
Example interface rendering
Shows an example interface for both light and dark modes.
Subscription Plan
A subscription key is required to unlock additional features of Inuvika OVD Enterprise. This page lists the existing subscription keys and provides an interface to upload a new key or delete an existing key.
Administrators
The administrators tab allows you to create administrators for multi tenancy. The administrators table displays the login, display name, weather or not the admin is global, and a delete button. To add an admin, fill out the Add form with the new admins (unique) login and password.
For more information, consult the Multi-Tenant Guide.
Administrator Properties
Clicking an administrator gives you the ability to modify them. The form changing an administrator allows for the display name, password, and global settings to be changed. You can delete the administrator by clicking the Delete this Administrator button. At the bottom, the administrator can be given access to administrate tenants, or have that access revoked.
For more information, consult the Multi-Tenant Guide.
Notifications
These settings define the set of administrator email addresses to be notified by email when specific events occur.
Recipients
- mail to: add one or more email addresses which should receive the notification emails.
Global vs Tenant Events
If Multi Tenancy is activated there are Global and Tenant Events.
Events
Choose which events should generate an email notification:
- License breach: the number of licenses to be allocated has exceeded the number of licenses available. See the Software License Management Guide for details.
- License expiry: a software license has expired or is about to expire. See the Software License Management Guide for details.
- License threshold reached: the number of licenses remaining has reached the threshold set for this application. See the Software License Management Guide for details.
- Server status changed: the status of a server has changed
- Session failed to start: a user attempted to start a session, but it failed to start.
- SQL failure: an SQL error has occurred.
Database Settings
This page displays the configuration for the MySQL database. It is recommended to have the MySQL engine running on the same server as the OSM.
Service Notices
Note
This tab is not available when the administrator has both enabled Multi-Tenancy and is in the global view. To regain access to this tab, the administrator must select a tenant.
Warning
If Multi-Tenant is enabled, please ensure each tenant has a unique access point for their users to access OVD with as Service Notices are displayed for each unique tenant based on the access URL.
This means every domain's users should have a unique address/FQDN they use
to access OVD. For example, user1@testdomain.org and
user1@testdomainTWO.org do not use the same address to access OVD.
Instead, testdomain.org and testdomainTWO.org, have different access
points for their respective users.
A service notice is a public message that is shown to the users through OVD clients. Each tenant may have its own service message and these messages cannot be shared among different tenants.
The content of the message is in html format. The enable switch makes it possible to save a message's content without displaying it to the users.
The maximum size of a message's content is limited to 16 MB as per the database's limitations. However, administrators may still encounter a message indicating the message content is too large, despite the size being less than 16 MB. This is due to additional factors that can limit the maximum size of the message, such as:
- The PHP configuration key
post_max_sizelimits the size of the POST HTTP request that can be received by the Session Manager. The default size is 8 MB. If you would like to create or update larger messages, consider increasing this setting limit. - The PHP configuration key
memory_limitlimits the memory that can be allocated by a PHP script. Processing larger message content can exceed this memory limit so you may consider increasing this setting limit.
Client Restriction (OVD versions 3.3+)
Note
This tab is not available when the administrator has both enabled Multi-Tenancy and is in the global view. To regain access to this tab, the administrator must select a tenant.
Warning
If Multi-Tenant is enabled, please ensure each tenant has a unique access point for their users to access OVD with as message is displayed for each unique tenant based on the access URL.
This means every domain's users should have a unique address/FQDN they use
to access OVD. For example, user1@testdomain.org and
user1@testdomainTWO.org do not use the same address to access OVD.
Instead, testdomain.org and testdomainTWO.org, have different access
points for their respective users.
Client restriction configuration allows an administrator to control a minimal version of Enterprise Desktop and Mobile Clients used by a user. These settings can be controlled for either of the clients:
-
Minimal version: Minimal version of the client (e.g. 3.2.1). If a user uses a client with a lower than specified version, public message is shown to the user through the OVD client. -
Enforce on startup: When set to yes, a user using a client of a lower than specified version won't be allowed to start a session. -
Message: When the client version is lower than specified, this public message is displayed to the user within OVD clients. Placeholder variables {{client_version}} and {{required_version}} can be used within the body of message.Warning
This message is presented to the users of your OVD platform before they login from any client. As service notices do not require the user to be logged in, do not expose any confidential information here. To send non-public messages to your users, please use the Messaging feature instead.
Users
Note
This tab is not available when the administrator has both enabled Multi-Tenancy and is in the global view. To regain access to this tab, the administrator must select a tenant.
By default, OVD uses the internal database to store information about users and user groups as well as for authentication. In this mode, users and user groups are managed within the OVD administration console.
These settings can be changed as described in the System section. If you are using a directory for user authentication, users will be displayed in read only mode. If you are also using a directory to define the user groups, then both users and user groups are displayed in read only mode.
The following information is provided for the case when the internal database is being used for users and user groups.
Users
Note
This tab is not available when the administrator has both enabled Multi Tenancy and is in the global view. To regain access to this tab, the administrator must select a tenant.
The first tab displays a list of the users defined in the system. The number of users displayed is limited by the Maximum items per page setting in the System section. When there are more users available than the limit defined, a filter can be used to find the users that you wish to manage.
A new user can be created by entering the user login, display name and password for the user and then clicking the Add button. The system will create the new user and add the user to the default user group. The user properties can then be modified by selecting the user from the list.
The populate function provides a way to create a base set of users in the internal database. This is designed for use in the product evaluation phase as a quick way of creating a test set of users.
User Properties
Clicking a user gives you the ability to view and modify their information. The following information can be accessed in this way:
- Login: name used to start a session.
- Display name: update the display name.
- Email address: update the email address.
- Status: shows whether the user is enabled or disabled.
-
Password related information:
-
Last updated: the date when the password was last reset
-
Status: whether the password is expired or not
-
-
User Groups with this user: a list of the groups the user is a member of.
- Published Applications: applications the user can access during their sessions.
- Session Settings configuration: override settings to give the user specific configurations.
- Privacy: download or delete reporting records for the user.
When Internal Mode is used, more actions are possible:
-
Enable/Disable: enable or disable the user.
-
Delete this user: delete the user.
-
Change user password: set a new password for the user.
-
Force user password change: force the user to change their password during their next login.
When Two-Factor Authentication is enabled, the following information and actions are available:
-
Status: 2FA configuration status. Previously configured 2FA methods can be reset by clicking the
Reset 2FAbutton.Important
Reconfiguration of Duo authentication is not supported and can only be done through Duo directly.
-
Duo Security: Duo's configuration status. Where available, Duo's enroll URL can be copied to the cliboard by clicking the
Copy Enroll URLbutton (introduced in version 3.2).Warning
Copying Duo's enrolling URL to clipboard requires HTTPS access (i.e. an administrator is using OAC through https://...)
User Groups
Note
This tab is not available when the administrator has both enabled Multi Tenancy and is in the global view. To regain access to this tab, the administrator must select a tenant.
A user group is one of the key objects in OVD. It defines a group of users and is used by the system to apply various policy settings to the users defined in the user group. It is important to design and define the user groups with a clear understanding of how they will be used so that user administration can be performed more easily.
The main tab displays a list of the available user groups and the ability to create a new user group or delete an existing user group. A user group can be selected by clicking the user group name and then the user group properties page will be displayed.
Adding a new user group requires entering the user group name and an optional description. After adding the new user group, the user group properties page will be displayed.
Default User Group
If a default user group is defined, then all users in the system will be added to this group. A default user group is not required but may make certain administration tasks simpler. Only one user group can be defined as the default user group. The current default user group if defined, is displayed as an attribute of the user group on the main user group tab. Modifying which user group should be the default user group can be done by first removing the default property from the current default user group and then adding the default property to the required user group.
User Group Properties
Note
This tab is not available when the administrator has both enabled Multi Tenancy and is in the global view. To regain access to this tab, the administrator must select a tenant.
On this page, details about the chosen user group will be displayed, some of which can be modified directly on this page:
- User group details with the option to delete the group
- The group can be promoted to be the default user group or removed if it is already the default user group.
- Blocking a group prevents member of the group from accessing published resources.
- Modify the group name/description.
The section List of users in the group displays the users currently in the user group and provides the ability to add users to and remove user from the user group.
The section List of publications for this group displays the current publications associated with the user group and provides the ability to add/remove a publication.
The section List of published Server Groups for this group displays the server groups currently defined for the user group and provides the ability to add/remove a server group.
The section Policy of this group displays the current policy settings related to OVD administration for the user group and provides the ability to add/remove policy settings. These settings are used for defining delegated administration rights for a set of users.
The section Shared Folders displays the shared folders currently defined and provides the ability to add a shared folder with the selected access rights or to remove a shared folder.
The section Session Settings configuration displays the overridden session settings for the user group and provides the ability to modify a setting, remove a setting or add a new setting.
Domain Integration Settings
Note
This tab is not available when the administrator has both enabled Multi Tenancy and is in the global view. To regain access to this tab, the administrator must select a tenant.
The Domain Integration settings specify how users and user groups are to be managed within OVD.
Caution
If user profiles have ALREADY been created, changing the type of domain integration will unlink the user profile from the associated user and the set of users will be associated with the new integration target.
Internal Mode
By default, an OVD environment is set to use Internal mode. In this mode, all the user and user group data is stored in the MySQL database defined by the database settings in the System section. Users and user groups are managed through the OVD administration console. Data concerning the location of the user profile is also managed within the MySQL database.
This mode will typically be used for evaluations or when no directory integration is required.
In order to provide both Windows and Linux applications, OVD uses a dynamic profile mechanism. The mechanism is implemented as follows for a Windows Application Server:
- On each Windows OAS server, a local administrator account called OVDAdmin creates the OVD user session.
- A dynamic profile of the form p_xxxxxxx_APS is created in the user profiles folder.
- When the user logs off, the user's AppData folder and ntuser.dat file are saved to the OVD File Server (OFS) and the dynamic user profile is deleted from the Windows server.
Microsoft Integration
This mode is selected when Microsoft Active Directory is being used to manage users and user groups. OVD will retrieve data from Active Directory in read-only mode. The settings for Active Directory are described below.
Server
- Domain: the domain name of the Active Directory server. The domain name must be defined in lowercase.
- Primary Host: if the Active Directory server is not registered in the DNS system, then specify the IP of the primary Active Directory server.
- Secondary Host: if the Active Directory server is not registered in the DNS system, then specify the IP of the secondary Active Directory server.
- Advanced options:
- LDAP port : 389 is the default TCP port. If another port is being used, enter the port number in this field.
- Use LDAP encryption (SSL): Not enabled by default. Please refer to the Microsoft Active Directory Integration Guide for further information on enabling SSL access to Active Directory.
- Specific organization unit: an OU can be specified to filter the directory data. Data defined for other OU's will be ignored.
- LDAP connection timeout: enter the value in seconds to be used as a timeout value when executing LDAP requests. A default value of 15 seconds is used. The value is common to Active Directory and LDAP.
- Password change method: Please refer to section Users Password for more information.
Authentication
- Login: enter a domain account that has at least read access to the directory.
- Password: the associated password.
User groups
- Use Active Directory user groups: OVD retrieves the user group data from Microsoft Active Directory.
- Use Internal user groups: Microsoft Active Directory user accounts are assigned to OVD user groups within the Administration Console.
User Session Configuration
Refer to the Microsoft Active Directory Integration Guide for more details about this section.
Lightweight Directory Access Protocol (LDAP)
Server
- Primary Host: the URL or IP of the LDAP server.
- Secondary Host: optional.
- LDAP port : 389 is the default TCP port. If another port is being used, enter the port number in this field.
- Use SSL: Not enabled by default.
- Base DN: specifies the point in the directory at which to start searching for user data.
- Connection Timeout: enter the value in seconds to be used as a timeout value when executing LDAP requests. A default value of 15 seconds is used. The value is common to Active Directory and LDAP.
Authentication
The bind parameters must specify a user with at least read access to the directory.
- Anonymous bind: enabled by default
If not using anonymous bind, then the following fields must be specified:
- Bind DN (without suffix): the distinguished name of the user account to use for the bind.
- Bind password: the associated password.
Users
Specifies how to identify the user login and display name fields. The posixAccount definitions are used by default and the values are:
- Filter: (objectClass=posixAccount).
- Specific OU (optional): defines the OU value to be filtered on.
- Distinguished name field: by default uid.
- Display name field: by default displayName.
- Locale field (optional): the locale to be used.
- Persistent UID/GID (optional): create users using the UID and GID
values from your LDAP server.
- UID: the user attribute that contains the UID.
- GID: the user attribute that contains the GID.
User Groups
User groups can be managed internally by OVD or within the LDAP server.
- Use Internal User Groups: LDAP user accounts are assigned to OVD user groups within the Administration Console.
- Use LDAP User Groups: OVD retrieves the user group data from the
LDAP directory. The posixGroup definitions are used by default and
the values used are:
- Filter: (objectClass=posixGroup).
- Specific OU (optional): defines the OU value to be filtered on.
- Name field: specifies the name field to be used in the query. The default is cn.
- Description field (optional): provides an optional description.
- Use the following field from the user entry: not enabled by default. Can be used to specify a specific field in the user entry (by default member) and map it to either the group name or the group DN to retrieve the user group data.
- Use the following field from the group entry: enabled by default specifies a specific field in the group entry (by default memberUid) and map it to either the user login or the user DN to retrieve the user group data.
A test can be performed to check access to the directory using the configuration settings.
Authentication Settings
Note
This tab is not available when the administrator has both enabled Multi Tenancy and is in the global view. To regain access to this tab, the administrator must select a tenant.
This page defines how OVD users will connect to the platform in terms of authentication.
Authentication methods
This section describes the user authentication methods that are available in OVD. Some methods may require additional configuration to work correctly.
Password
OVD's default authentication method using traditional login / password.
Remote User
Delegate authentication to the Web server (Apache) authentication modules.
Those modules then provide the authenticated user login in the REMOTE_USER
environment variable.
Typically, this is the machenism used when configuring Active Directory SSO using Kerberos.
SAML2
OVD supports user authentication using SAML 2.0 Identity Provider. Please refer to the SAML 2.0 Configuration Guide for further details.
Security Settings
This section controls password and Two-Factor Authentication (2FA) parameters.
-
Password Change Allowed: Defines whether users can change their password or not.Important
Disabling this parameters whilst having a password expiry policy implemented will lead your users to have a poor experience as they will be prompted to change their password despite not being able to.
-
Two-Factor Authentication enabled methods: Defines which 2FA method to enable for users.For more information, please read Methods for 2FA with OVD.
-
Two-Factor Authentication enforced methods: Defines which enabled 2FA method to enforce for users. This will force users to setup 2FA at their next login for the enforced methods selected. -
Backup Code method for Two-Factor Authentication: enable or disable backup codes, also known as emergency codes or rescue codes. -
Disabled Network Ranges for 2FA: Network ranges in CIDR format (172.16.1.0/24). Users logging in from these source IP ranges will not be prompted with 2FA.Important
This check is performed before any 2FA method is used. If the user has their Duo account locked or disabled, they will still be able to login when they are accessing OVD from a location defined in the Disabled Network Ranges for 2FA.
-
Email MFA related settings:
-
Auto-Configure User's email attribute: Automatically pre-fill the users email address based on the associated directory service field -
Allow users to add custom email addresses: Allow users to add a custom email address that is not already defined in the directory service -
2FA Email template message: Customise the email that will be sent by users choosing to receive a OTP via email
-
-
Security keys related settings
Webauthn App ID: Defines what base URL is used to access OVD via the web. This is required for security keys to work.
-
Duo Security related settings
-
Duo Integration Key: Integration key generated during the creation of the OVD application on the Duo console -
Duo Secret Key: Secret key generated during the creation of the OVD application on the Duo console -
Duo API Hostname: API hostname generated during the creation of the OVD application on the Duo console -
Duo fallback response: Defines what to do if the communication between Duo Security and the OVD Session Manager is interrupted.Deny Loginprevents further user login.Allow Loginacts as if Duo was not configured for the user trying to login.
-
These settings can be re-defined on a per-group/user level.
Messaging
Administrators can create messages that are sent to users in-session. These messages can be simply acknowledged as received or administrators can provide specific responses to collect feedback from users.
Please refer to the Messaging Guide for detailed instructions on how to use this feature.
Servers
The Servers section is used to manage the servers in the OVD farm. The first tab shows the list of all registered servers within the OVD server farm. It also shows information about the server:
- Server name (by hostname, FQDN or IP).
- Type, can be Windows or Linux.
- Version, provides version information about the operating system running on that server.
- Roles can be Application Server, File Server, or Gateway, together with an indication that the role is either Enabled or Disabled.
- Status can be Online, Offline, or Broken. Additionaly, Under maintenance might be displayed next to the status.
- Details, provides some hardware information about the server.
The status of each server may be changed by selecting the action to Switch to maintenance or Switch to production.
Server properties
Selecting the server name displays detailed information about the server.
Monitoring
A snapshot of the server resource usage is displayed
- CPU usage
- Memory usage
- Session usage
- Disk usage
Configuration
-
Display name: blank by default. If not set, the internal name is used. This field is used to provide a better server visibility
-
FQDN or IP Address (required field). By default, the server IP address is used but may be replaced by the server's FQDN.
-
RDP port for this server (required field). By default, TCP 3389. You can change this port to allow direct access from a NAT system. This port must be changed to a different value for each OVD OAS server that users may connect to.
-
Roles available on this server: The current role and status of the server is displayed. The Application Server, Gateway and File Server roles can be enabled/disabled.
-
Switch to Maintenance / Switch to Production: Server can be switched between Maintenance and Production modes.
-
Force log off sessions. This action is only available when the server status is "Under maintenance". Clicking the button will force log off all active and disconnected sessions.
Important
A server in maintanance mode will not support any new sessions, although any active or disconnected session is still allowed to finish. If you want to end all sessions still running on the server, use Force log off sessions functionality as described above.
- Recover from a broken status. This action is only available when the server status is broken. In this case, assuming the problem that caused the broken status is fixed, clicking the Recover button will cause OVD to attempt to recover the server by checking communication availability with it. If the communication is successful, the server status will switch back to online.
Shared With the Following Tenants
A server may be shared with any number of existing organizations. Clicking Share With this Tenant shares the server with the selected tenant. Clicking Unshare From this Tenant removes access to the server from that tenant.
List of Server Groups Including This Server
Note
This section is not available when the administrator has both enabled Multi Tenancy and is in the global view. To regain access to this tab, the administrator must select a tenant.
A server may belong to a server group. A server can be added to one of the available server groups presented in the drop down list. If the server is already in a server group, it may be removed. The server group functionality allows the administrator to allocate a set of servers to one or more user groups so that user sessions for those specific user groups are allocated to specific servers.
Role: Application Server
Clicking the link displays the following information:
-
Number of available sessions on this server: A value is automatically set at installation time depending on the available server resources. This value represents the maximum concurrent user sessions this server can host. Additional user sessions above this limit will be prevented.
-
Activate memory allocation enforcement: When memory allocation is defined in resource restrictions, this button offers a guarantee that users will always have the memory they require. The server authorizes session start only if the user has a limit defined and the sum of all limits plus the system memory is lesser than the total memory of the Application Server (i.e. User Memory < ApS Memory).
-
Maximum Memory Available to Server: By default, the system memory used by memory allocation enforcement is computed. This preference forces a value which overrides the computed value.
-
Resource monitoring per session: Each session is listed with its resource usage:
- CPU usage per session
- Memory usage per session
- Memory locked per session: this value is only available when memory enforcement is activated.
-
Global resource monitoring: display a summary of all resources used across the farm:
- Global CPU usage
- Global Memory usage
- System Memory usage: memory used by servers without sessions (value computed)
- Global memory locked: this value is only available when memory enforcement is activated. It shows all the Memory locked on the server by sessions and the system.
-
Applications available on this server: Lists all known applications on the server that are available for publication.
- Linux OAS servers: Only applications that have a .desktop
file associated with it are listed. On the Linux application
server this is determined by the set of .desktop files in
the folder
/usr/share/applications/. - Windows OAS servers: Applications that are available in the
folder
C:\ProgramData\Microsoft\Windows\Start
    Menu\Programs
are listed. - Clicking on an application icon will display the Applications page for that application.
- Linux OAS servers: Only applications that have a .desktop
file associated with it are listed. On the Linux application
server this is determined by the set of .desktop files in
the folder
Note
On a Windows Application Server, Internet Explorer is not
displayed by default as an application in the OVD Administration Consol.
To correct this, create a shortcut in the corresponding folder.
For example, for Internet Explorer 11 on a Windows server, create a shortcut in
the folder C:\ProgramData\Microsoft\Windows\Start
Menu\Programs.
Similarly, Windows Explorer is not displayed as an application
by default in the OVD Administration Console. To add Windows Explorer,
create a shortcut for it in the appropriate folder. e.g. for a Windows
server, create a shortcut for it in the folder
C:\ProgramData\Microsoft\Windows\Start Menu\Programs and add
the default drive as a parameter in the shortcut's target field.
Alternatively, specify %userprofile% as a parameter in the target
field to open the user's home directory.
Role: File Server
Clicking the link displays the following information:
- User profiles on the server (displayed if user profiles have been
created on this server)
- Owner: the name of the user associated with the profile.
- Status: an indicator of whether the profile is ok or corrupted.
- Shared Folders on the server (displayed if shared folders have been
created on this server).
- Name: the shared folder name. Clicking the shared folder name redirects the browser to the shared folders page.
- Used by: the list of user groups for whom the shared folder is published.
- Action: allows the administrator to create a new shared folder on the server.
Unregistered Servers
All newly installed APS servers will be listed on this page. A server must be registered before it can become part of the operational OVD farm. During this process, various information is transferred from the server to the Session Manager.
Important
If no register button is displayed, verify that there are no firewall issues preventing communication between the OSM and the server. Please refer to the Architecture Overview and System Requirements document for further details.
Server Settings
This page controls the integration of OVD servers into the OVD farm.
- Authorized machines (FQDN or IP - the use of wildcards
*.is allowed): This option allows the access and registration only from servers in the set of authorized servers. By default, the list is empty which means there is no restriction in place. - Disable reverse FQDN checking: Removed in OVD 2.0. This option was merged into the Use reverse DSN for server's FQDN setting.
- Use reverse DNS for server's FQDN: By default, the setting is not enabled (i.e. it is set to 'no'). The FQDN for the server must be an IP address otherwise the system will not work correctly. If using reverse DNS is enabled, then the system checks the server's FQDN by using the reverse DNS record associated with the server address. Using the reverse DNS setting is not fully compatible with the usage of the EDC on MacOS. In this case, make sure the EDC is connecting through an ESG server. This issue is related to the Microsoft DNS resolution mechanism. For further details, please see the KB article "Connection issue with the EDC on MacOS when using a Windows OAS registered with an FQDN on the OSM" on the KB center at https://support.inuvika.com/portal/kb/articles/o4j6x7ok4t.
- Action when a server status is not ready anymore: This option specifies what the system behavior should be if a server status changes to not ready. By default, this value is set to do nothing in which case the server status has no impact on the system status. An alternative is to set the system into maintenance mode.
- Auto-recover server: When a server status is either down or broken, the server status can be switched back to ready automatically if this setting is set to yes. Otherwise, manual intervention will be required to bring the server online.
- Remove orphan applications when an application server is deleted: If an application server is deleted from the OVD farm, the applications served by that server become orphaned. In cases where the server will be replaced by new hardware immediately, the setting no can be selected. Otherwise, it is recommended to either set this value to yes or perform the removal of orphaned applications using the command available in the Applications section. By default, the value is no.
- Auto register new servers: by default, new servers will not be registered automatically; this process must be performed manually. If you want a new server to be registered automatically, choose yes for this setting.
- Auto switch new servers to production mode: by default, new servers will not be put in production mode; the process must be performed manually. If you wish new servers to be put into production mode, set this value to yes.
- Applications icon size: Set the size (in pixels) of the icons the Application server will retrieve. This setting will impact the quality of the newly imported icons, but will not change the current applications. The bigger this number is, the better the quality of the icon image will be. However, larger icon sizes will result in longer download times for the client.
-
When an Application Server has reached its max sessions limit, disable session launch on it: By default, no more sessions can be created on the application server once the specified limit has been reached. If the value is set to no and the number of concurrent sessions running on the application server exceeds the limit specified, the information will be logged and additional sessions can still be created.
-
Linux Storage Management Timeout: The time limit before a mount or unmount action for a storage is considered as failed. This parameter is only available for Linux Application Servers.
-
Load Balancing policy for Application Servers: The load-balancing policy determines how the OSM allocates application server(s) for a new user session. The default values can be edited to suit the needs of your environment.
Note
If there is more than one File Server in the OVD server farm, the OSM will allocate the file server for a new user profile based on a random allocation.
Application Server Load Balancing
The default application server load balancing policy is governed by the overall goal of minimizing the number of application servers involved in a user session. This goal applies whether the user session is a desktop or application mode session. For a desktop session there is a secondary goal to maximize the numbers of applications served by the desktop server.
The criteria used by the load balancing policy may be adjusted by the system administrator to place a greater or lesser importance on each criterion by modifying the server settings as described above in the Server Settings section. Any change should be carefully tested before being used in a production environment to ensure it behaves as expected.
When a new session is created, the load balancing policy computes a load balancing value for each application server based on the set of weighted criteria. The criterion ratio multiplied by the criterion weight for each criterion is summed across all the criteria to calculate the load balancing value for each application server. The load balancing values are then sorted in descending order.
If the session is a desktop session, the server list is filtered to exclude servers that do not match the desktop type or that are not configured to be a desktop server. The server with the highest load balancing value is then selected as the desktop server.
If the session is an application mode session, the first server in the list is selected.
If the server selected cannot serve all the applications required by the user session, then a further iteration is made after first removing the selected server from the list and re-computing the ratio for the application criteria based on the set of applications that still need to be served. In this iteration, the selection is based solely on the highest load balancing value as the desktop type is no longer relevant. This process is repeated until all applications have been assigned to an application server.
Load Balancing Criteria
All the criteria are expressed as a number between 0 and 1.
Memory: this criterion represents the percentage of free memory available as measured by the average free memory in the last sampling interval.
CPU: this criterion represents the percentage of CPU resources available as measured by the idle CPU in the last sampling interval.
Number of sessions: this criterion represents the percentage of free sessions available as calculated by using the number of sessions running on the server in the last sampling interval and the maximum number of sessions configured for that server. If no maximum number of sessions have been defined for a server, a theoretical number is calculated based on the server's physical resources.
Number of applications: this criterion represents the percentage of the applications required for the user session that can be served by the application server.
Randomization: this criterion is a random number between 0 and 1.
Server Groups
Note
This tab is not available when the administrator has both enabled Multi Tenancy and is in the global view. To regain access to this tab, the administrator must select a tenant.
One or more user groups can be assigned to a server group. User connections will then be prioritized to use one or more servers from this server group. If no servers from the group are available then (default behavior), the user session is established to one or more external servers. OVD will first consider servers not published as a part of a server group, followed by the rest of the servers.
A server group can be disabled in order to not consider it in the prioritization mechanism.
A global policy, Bypass server restrictions, is defined in the Session Settings and set to yes by default. The default setting allows users to connect even if no server from the server group is available. If set to no, if no server from the server group is available, users will not be able to connect. The Bypass server restrictions can be specified as a user group policy.
This tab displays the available server groups and allows a new server group to be created. The user group defines which users are assigned to the server group. To modify the settings for a server group, select the server group using the server group name or the manage button.
File Server Clusters
The file server clusters tab displays the available file server clusters which have been defined to use the high availability configuration for the OVD File Server component. Currently, only one file server cluster can be defined in an OVD Farm. If no cluster has been defined, a new cluster can be added on this page. Once a file server cluster has been added, the settings for the cluster can be modified by clicking on the File Server Cluster name or the Manage button.
Applications
The first tab displays a list of all the applications within the OVD farm that are available for publication. An application is displayed only once even if installed on multiple application servers. An application may appear more than once if its installation or configuration data is different between application instances. The available applications on an application server are determined when an application server is registered with the OSM or when a new application is installed after registration. In addition, the administrator may create a static application which will also be displayed in this list. Selecting an application will display the application properties. If the application selected is a static application, the properties page displayed will be the one described in the static applications section.
This page also permits orphaned applications to be removed. An orphaned application is an application that is no longer available within the OVD farm on a registered application server. This occurs when an application server is removed from the OVD farm for some reason and not replaced with an equivalent server. In this case the action to remove orphaned applications must be performed.
Application Properties
On this page, details about the chosen application will be displayed, some of which can be modified directly on this page:
- The application icon can be selected or a new icon uploaded.
- A copy of the application can be created by cloning it to a static application. The copy will then be listed in the Static Applications tab. These applications can be modified to use specific settings for launching the application as described below in the section Static Applications.
The section Servers with this application displays all the application servers that host the application. In the case of multiple servers, the application server chosen to serve the application will be determined by the load-balancing configuration set in the Configuration section.
The section Groups with this application displays all the application groups that contain the application. The application can be added or removed from an application group. When the administrator has both enabled Multi Tenancy and is in the global view, you cannot view, add, or delete groups.
The section Mime-Types displays a read-only list of the mime-types associated with the application. Mime-types associated with the application can be changed by creating a static application and modifying its configuration.
The section Software Licenses is part of OVD Enterprise and provides a shortcut to create a software license or view existing software licenses for this application. In addition, the software license threshold can be set. This defines the point at which an alert will be generated regarding the number of licenses remaining unallocated. Please refer to the Software License Management Guide for further details. This section is not available when the administrator has both enabled Multi Tenancy and is in the global view. To regain access to this tab, the administrator must select a tenant.
Static Applications
Note
This tab is not available when the administrator has both enabled Multi Tenancy and is in the global view. To regain access to this tab, the administrator must select a tenant.
A static application is created and managed by the OVD administrator. A static application should be created if an application must be customized to configure the command line parameters, mime-types or the application server to serve the application.
The main tab lists the currently available static applications which can be deleted or modified. An application can be selected to display the static application properties page which is also automatically displayed after creating a new static application.
A static application may be created in one of the following ways:
- On the static applications page by providing the information to add a static application.
- By cloning an application already listed by OVD in the applications tab.
To create a static application on the static applications main page, choose the type of application, either Linux or Windows, provide a name, description (optional) and the command line parameters for the Linux or Windows application. Once created, the static application properties page will be displayed.
Note
The Web based static application has been deprecated. If a static Web application is required, create a Linux or Windows static application with the platform web browser as the executable and add the required URL as a parameter.
Static Application Properties
Note
This tab is not available when the administrator has both enabled Multi Tenancy and is in the global view. To regain access to this tab, the administrator must select a tenant.
On this page, details about the chosen static application will be displayed, some of which can be modified directly on this page:
- Static application details with the option to delete the static application.
- Modify the name, description and command line.
- Modify the icon to be used by uploading a file containing an image of the icon to be used. OVD will convert the image to a 32 bit PNG file for use as the icon, resized to match the Applications icon size setting defined on the Server Settings page. Most image formats are supported but the ico file format is not supported.
The section Servers with this application displays all the servers that can serve this application. The association with a server can be removed.
The section Groups with this application displays all the application groups that contain the application. The application can be added or removed from an application group.
The section Mime-Types displays a list of the mime-types associated with the application. A new mime-types association can be added and an existing mime-type association deleted.
Application Groups
Note
This tab is not available when the administrator has both enabled Multi Tenancy and is in the global view. To regain access to this tab, the administrator must select a tenant.
An application group is a collection of applications. The combination of an applications group with a user group is called an application publication. An application publication specifies that the users in the user group will be presented with access to the applications in the application group when the user starts an OVD session. The main tab displays a list of the available application groups and the ability to create a new application group. An existing application group can be selected to display the application group properties page which is also automatically displayed after creating a new application group.
Application Group Properties
Note
This tab is not available when the administrator has both enabled Multi Tenancy and is in the global view. To regain access to this tab, the administrator must select a tenant.
On this page, details about the chosen application group will be displayed, some of which can be modified directly on this page:
- Application group details with the option to delete the group.
- Blocking the group will prevent users in any associated publication from being able to access the applications in the application group.
- Modify the group name/description.
The section, List of applications in this group, displays all the applications defined in the application group and provides the ability to add applications to and remove applications from the group
The section, List of publications for this group, displays the current publications associated with the application group and provides the ability to add/remove a publication.
Mime-types
This tab displays all the mime-types defined for all published applications as read-only data. Selecting More Information displays the applications associated with the mime-type.
Software Licenses
Note
This tab is not available when the administrator has both enabled Multi Tenancy and is in the global view. To regain access to this tab, the administrator must select a tenant.
OVD provides a feature for capturing software license data for the applications being served by OVD. For further details about this feature please refer to the Software License Management Guide.
Storage
Note
This tab is not available when the administrator has both enabled Multi Tenancy and is in the global view. To regain access to this tab, the administrator must select a tenant.
The Storage tab holds storage related OVD settings.
OVD User Profiles
Note
This tab is not available when the administrator has both enabled Multi Tenancy and is in the global view. To regain access to this tab, the administrator must select a tenant.
A large portion of the advanced configuration possibilities pertain to user profile data synchronization between the OAS and OFS. When an OVD user session is started with an active user profile, most of the user profile that is stored on the OVD File Server (OFS) is mapped into the user session running on the OAS. In the case of a Windows profile, the registry will be transferred to the OAS as it required to be on the local machine. If the user session requires multiple application servers, then the user profile is mapped to each application server. In the case of a Windows application server, the saved user profile registry files are transferred to the application server. Likewise, when the OVD user session terminates, changes to the registry data will be saved to the user profile on the OFS. If multiple Windows application servers are required for scalability reasons, it is recommended to arrange the configuration so that only one Windows server is available in a user session to avoid any potential registry conflicts.
The management of user profile data is based on a set of pre-defined rules. The rules control which data is saved and which data is not saved. The rules are defined in a configuration file located on each application server. There are three possible groupings of profile data:
- volatile: defines the files and directories that won't be saved in the user profile. This data will be discarded by the OAS at the end of an OVD user session.
- configuration: defines the files and directories that will be saved as configuration data in an Operating System specific directory in the user profile. These files and folders are mapped into the user session on the application servers and are made accessible via direct access from a network share.
- data: defines the files and directories located in the user's home directory that will be saved in the user profile. These files and folders are mapped into the user session on the application servers and are made accessible via direct access from a network share.
A profiles_filter.conf configuration file is provided with a
pre-defined set of filters for the user profile which will suit most
cases. This configuration file defines which files in the user profile
will be synchronized. If required, these settings can be changed to
accommodate a particular application or desired behavior. The filter
definitions can be changed by adding directions to include + or
exclude - particular files and directories.
Linux OAS User Profile configuration
The configuration files related to user profile data are located in the
/etc/ovd/rufs/ directory on the Linux OAS. These files are used to
configure the interaction between the Linux OAS and the OFS for managing
the user profile data.
The default.conf configuration file contains the settings which will be used to manage data for the user profile. Within this file the following sections are defined:
- The main section contains the names of the sections in the file whose settings should be consumed. Typically, there are sections for configuration, volatile and data.
- The translation section is reserved for internal use and should not be modified.
- The log section contains the settings for logging. In normal operation the logging is disabled and should only be enabled if specifically requested.
- The rules section defines the directories and files to consider as volatile, configuration or data. The specific settings for each group should not be modified in normal use.
The profiles_filter.conf file on the Linux OAS is located in the same directory location.
Windows OAS User Profile configuration
The configuration files on the Windows OAS are used to configure the interaction between the windows OAS and the OFS for managing the user profile data.
The C:\ProgramData\OVD\slaveserver\profile\default.conf
configuration file contains the settings which will be used to manage
data for the user profile and follows the same basic format as for the
Linux OAS described above. This file should not be modified in normal
use.
The profiles_filter.conf file is located in the
C:\ProgramData\OVD\slaveserver directory on the Windows OAS.
Shared Folders
Note
This tab is not available when the administrator has both enabled Multi Tenancy and is in the global view. To regain access to this tab, the administrator must select a tenant.
The shared folders tab displays a list of all available shared folders. It is possible to create a new shared folder or delete an existing shared folder. A shared folder must first be created and then the settings for that folder can be defined by selecting it. Shared folders are created on the OVD File Server and the access to the folder is controlled by the OVD File Server. The shared folders are mapped into a user session for each application server involved in the user session when the user connects to OVD. For shared folders to be active in an OVD user session, the Enable shared folders setting must be enabled. Further information about integrating external storage systems into Inuvika OVD can be found in the Data Storage Guide.
Clicking a shared folder name displays the properties:
- Server: the server IP/FQDN where the shared folder is located.
- Configuration: The shared folder name can be modified and a storage quota assigned.
-
Publications: This section controls which user groups have access to the shared folder and determines the access permissions (read or read/write) for that user group. Existing publications are listed and me ay be removed. If unpublished user groups are available, new publications may be added.
External Data Storage
Note
This tab is not available when the administrator has both enabled Multi Tenancy and is in the global view. To regain access to this tab, the administrator must select a tenant.
The external data storage tab displays a list of all folders that are mapped to external data storage devices. On this page it is possible to create a new folder, and delete or modify an existing folder. The folder will be mapped into the user session for each application server involved in the user session when the user connects to OVD. This mechanism does not involve the OVD File Server but creates a connection directly from the application server to the external data storage device. For external data storage folders to be active in an OVD user session, the Enable shared folders setting must be enabled. Further information about integrating external data storage into Inuvika OVD can be found in the Data Storage Guide. The settings reference an existing external data storage folder that you would like to give users access to. When creating a new folder reference, you can specify:
- OVD Session Folder (required): the name of the data folder as it will appear in the user session.
- Type (required): the type of external data storage. Select a value from the dropdown list. The possible selections are NFS, CIFS, webDAV, and webDAVS.
-
URI (required): This value should have the format <IP/FQDN>/<sharedfolder> where the IP/FQDN is the address of the data storage server and the sharedfolder is the path to the data folder on that server eg:
192.168.0.10/sharedfolder1. Do not specify the scheme as part of the URI. It is also possible to add a variable to represent the name of the user by entering ${user} as part of the URI eg.192.168.0.10/sharedfolder1/${user}. The ${user} variable will be replaced at runtime with the value of the userid entered by the user when connecting to the OVD session. This approach can be used to map home drives on an external storage device into the OVD user session. It is also possible to modify the evaluated value since it is treated as a variable by the underlying code. For example:${user}: returns the userid{user}[0]: returns the first character of the userid{user}[1:3]: returns the second and third characters of the userid
Additional advanced operations and replacements are also available:
-
Operations:
{user}[1:]: returns the userid without the first letter{user}[2:]: returns the fist two characters of the userid${user}[-1]: returns the last character of the userid{user}[-2:]: returns the two last characters of the userid
-
Variables:
{user.domain}: return the netbios domain of an Active Directory user eg.TEST{user.upn}: return the user principal name of an Active Directory user ex:user@test.demo
-
Authentication (required): the type of authentication. Valid values are OVD User Credentials - use the credentials the user used to start a session, Guest User - no credentials, and Custom Authentication.
If OVD User Credentials is selected, you can configure a login form using the same templating format as the URI. This allows for the use of different forms of login (based on the OVD user) to be used for authenticating the storage. For instance, when using an SMB storage with Active Directory users, the user login must contain a form of domain, such as
{user.upn}or{user.domain}\{user}.Note
If Custom Authentication is selected, the system will prompt for a login and password that users will use to authenticate against the external storage
Note
No authentication is required when using NFS and the system will disable the authentication section and set the authentication type to Guest User
-
Parameters (optional - for Linux application server only): specify any additional parameters that should be used using the syntax for options in the Linux mount command.
These settings can be modified by clicking the manage button associated with the folder and then modifying the settings presented.
To give users access to external data storage: first add the specifications for the folder and then go to its manage page. Once on the manage page, add access for a particular user group in the User Group section. Access can also be added for a specific user group by going to the manage page for the user group and adding the data folder as presented in the External Data Storage section.
Sessions
Note
This tab is not available when the administrator has both enabled Multi Tenancy and is in the global view. To regain access to this tab, the administrator must select a tenant.
The Sessions tab holds session related OVD settings.
User Summary
Note
This tab is not available when the administrator has both enabled Multi Tenancy and is in the global view. To regain access to this tab, the administrator must select a tenant.
This page is very important as a first step when troubleshooting a situation where a user has problems connecting to an OVD user session. The summary displays whether the user has access and if so, which applications, application groups, shared folders and external data storage folders are available.
A search filter is available to enable filtering when using large user directories.
Session Settings
Note
This tab is not available when the administrator has both enabled Multi Tenancy and is in the global view. To regain access to this tab, the administrator must select a tenant.
Session settings can be set globally for all users on this page or they can be set at the User Group or User level by selecting the relevant User Group or User and setting the specific setting value required. A user specific setting will override the user group setting which will override the global setting.
Session Settings
- Subscription limit policy: Describes a policy used when a user tries to start a new session while subscription's limit is already reached. Set to Prevent session start by default. Alternatively, Log off the oldest disconnected session can be selected.
- Default language for session: This setting has no impact for the OWA, EDC, and EMC clients because the client specifies the language to be used in the connection request. The setting is reserved for internal use.
- Session lifetime limit: Limits the session duration time. By default, there is no limit as indicated by none. Otherwise a message will be displayed to the user 3 minutes before the session is scheduled to timeout.
- Disconnected session limit: When this parameter is set to a value, a disconnected user session will be terminated after the specified interval.
- Idle session limit: If there is no keyboard or mouse activity for the specified interval, the user's session is disconnected or terminated depending on the session's persistent setting.
- Time restriction: Access is only allowed during select time slots (no time restriction by default).
- User can launch a session even if some of his published applications are not available: Set to no by default. To prevent any login failures, it should be set to yes.
- Use known drives: If set to yes, network shares are directly accessed from the application server and not through x-RDP redirection. Set to no by default.
-
Bypass server restrictions: By default, set to no. If set to yes, then if there is no server available for a session based on the server restrictions that have been applied, the system will try to allocate other servers for the user session.
-
Remote audio playback: Activate audio playback redirection from RDP server to client. This setting is enabled by default.
-
Remote audio recording: Activate audio recording (microphone) redirection from client to RDP server. This setting is enabled by default.
-
Play audio on remote server: Audio playback is not sent through the RDP connection and is played on the remote server instead.
Use this option when a third party software is in charge of the remote audio. This setting is only relevant for Windows Servers.
This setting is disabled by default.
-
Redirect client drives: For the EDC, the user session can be set to no access to any client drive, partial access or full access. Partial access allows access to the user specific folders on the client device such as Desktop, Documents, Pictures etc. in the OVD session, but access to USB drives, Network drives and local drives is not available. Full access allows access to the user specific folders on the client device as well as access to USB drives, Network drives and local drives. In the case of the HTML5 client, the setting can be either no access to any client drive which disables the ability to upload and download files from/to a local drive; or full or partial access in which case the ability to upload files from any drive and downloading files is enabled. For the iOS client, the setting does not apply. For the Android client, access to an SD drive can be controlled through these settings. The default setting is full.
-
Redirect client printers: For the Enterprise Desktop Clients, when the setting is yes (default), all the printers available on the client machine can be redirected.
-
Select printer(s) that will use the native driver: For Windows clients and Windows servers only, printers whose name or driver name matches an element within this list will be redirected using their native driver (instead of the OVD PDF layer). For those printers, their driver must be installed on all Windows Application Servers.
Open the printer properties dialog to find the printer name and its driver name as shown below:
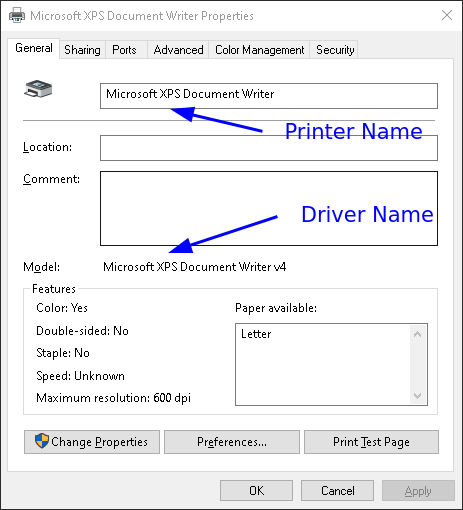
-
Select printer(s) that will not be redirected: Printers whose name or driver name matches an element within this list will not be redirected.
Open the printer properties dialog to find the printer name and its driver name as shown above.
-
Redirect Smart card readers: OVD provides support for Smart Card readers within a Windows Application for the Enterprise Desktop Client on Windows and Linux. Linux support may vary depending on the specific hardware being used. The HTML5 client and other clients do not support Smart Card redirection. Set to no by default.
- Clipboard redirection: Enable or disable the Copy/Paste functionality within an OVD session. When activated (default), copy/paste is allowed to/from the client. When not activated, copy/paste is disabled.
- Synchronize OneDrive metadata: Disabled by default. When this setting is enabled, OneDrive metadata is synchronized in the profile. This synchronization is a reference to the OneDrive folders, not the actual data itself.
- Additional OneDrive locations:
When the setting
Synchronize OneDrive metadatais enabled, OneDrive metadata is synchronized for this particular location. By default, only OneDrives at the root of the profile are synchronized. Path locations should be input as relative to the home directory. - RDP bpp: OVD provides 16 bit color by default. 24 and 32 bit color depth settings are also available.
- Enhance user experience: The default setting, enabled, provides a richer graphics experience but does use more bandwidth. Consider disabling for WAN connections to preserve bandwidth. When enabled font smoothing and desktop wallpaper are supported for all clients providing the application server is also configured to support these capabilities.
- Remote FX capabilities: Enabled by default. Remote FX as an enhancement of the RDP protocol, adding modern image encoding capabilities, adaptative display quality, and better devices support. All with improved network bandwidth usage. The downside is more computational resources used on the servers.
- Remote FX capabilities for External Apps: Enabled by default. Enable Remote FX capabilities between two application servers.
- Advanced Video Coding (AVC): Enabled by default. AVC is used to encode the full screen or a partial area with video encoding technologies. The result is even better bandwidth gains compared to Remote FX. Usually, a GPU capable of hardware AVC encoding is required on the server side to use this feature with many concurent user sessions.
- Advanced Video Coding (AVC) for External Apps: Enabled by default. Enable Advanced Video Coding between two application servers.
- Multi-monitor support: Disabled by default. When this setting is enabled, the client will connect the session across all of the user's available screens when the fullscreen mode is selected.
Otherwise, if the setting is disabled, the session is started on only one screen.
Currently this setting is only supported by the Enterprise Desktop Client when connecting to a Windows desktop session. This setting is disabled automatically if the session defines any external applications. A maximum of four screens are supported.
- Use local IME integration: Disabled by default. When using an Asian keyboard (eg Japanese, Korean or Chinese), it is recommended to enable this setting. Doing so will offer a better integration with your local Input Method Engine with respect to the candidate list position and input method status.
- Client will download all application icons in an archive: By default, set to no. If enabled, all the icons associated with OVD applications are downloaded in an archive file. Enabling this option may speed up the time to make applications ready to use.
- Delay before displaying desktop in application mode: In application mode, this property specifies the delay before displaying the applications as ready to allow other system actions to take place. For example, with an Active Directory, a security policy can ask the user to confirm an action or change his password, in this case, a delay can be defined before displaying the notification.
- Faster application installation on desktop in external apps: By default, set to no. When external applications are available, the applications are published when the applications are defined as ready to use by the OAS used to run those applications. Setting this value to yes will allow the icon for the application publication to be immediately displayed for the user without waiting for the status to be provided by the OAS server. If the user selects an application that has not been marked as ready to use, a progress bar will be displayed until the application is ready.
- Sessions are persistent: The default setting, yes, means that sessions are persisted so that a session will remain in a disconnected state on the server when the user disconnects the session or a network/client issue causes the session to become disconnected.
- Follow me: Set to yes by default. This allows the disconnected session to be re-established on a different device. For this to work, persistent sessions must be enabled.
- Concurrent licenses availability policy: The default setting No session delivered, will prevent a new user session from starting if as a result, the OVD concurrent user count would be exceeded. In this case the user will be informed via a dialog box on the OVD client. Alternatively, the system can be set to Logoff the oldest disconnected session and allow the new user session to be started.
- Persistent user profiles: Set to enabled by default. This setting will cause the user profile to be saved on the OVD File Server after the session ends. An external storage system may be integrated into the OVD File Server to store user profile data, please refer to the Data Storage Guide for details.
- User profiles data storage limitation (quota): The default zero setting means there is no limit on the size of the profile storage. Setting a value defines the maximum amount of data storage to be allocated to a user profile. The quota can be defined as an integer value with or without a storage unit. If the unit is not specified, then bytes are assumed. The storage unit can be specified as Kilobyte, Megabyte and Gigabyte.
- Auto-create user profiles when non-existent: The default setting yes, will create a default user profile on the first login.
- Launch a session without a valid profile: The default setting no, does not allow a user session to be launched if a user profile is corrupted.
- Enable shared folders: The default setting, yes, enables shared folders to be mapped into an OVD user session. This requires the use of an OVD File Server (OFS) to provide storage for the shared folders or for a folder to be mapped using External Data Storage.
- Launch a session even when a shared folder's fileserver is missing: The default setting, yes, will allow the user session to be launched if the shared folder is not available. If the value is set to no, the session will not be launched if the folder cannot be mapped.
- Allow user to force shared folders: The default setting, yes, enables the system to use a Shared Folder that is mounted on external data storage. Please refer to the Data Storage Guide for details.
- Launch a session even when an External Data Storage mapping is not available. The default setting, yes, will allow the user session to be launched if the External Data Storage folder is not available. If the value is set to no, the session will not be launched if the folder cannot be mapped. In both cases, an error message will be logged.
-
SMB version used to mount external resources. SMB is a file sharing protocol. Possible values are:
- 1.0: The classic CIFS/SMBv1 protocol.
- 2.0: The SMBv2.0 protocol. This was initially introduced in Windows Vista Service Pack 1 and Windows Server 2008.
- 2.1: The SMBv2.1 protocol that was introduced in Microsoft Windows 7 and Windows Server 2008 R2.
- 3.0: The SMBv3.0 protocol that was introduced in Microsoft Windows 8 and Windows Server 2012. This value can be overridden for External Data Storages if you have specific servers which require older or newer versions.
OVD version restrictions
CIFS/SMBv1 is available for OVD versions prior to 3.2. CIFS/SMBv2.1 is the default for OVD versions prior to 3.3. CIFS/SMBv3.0 is the default for OVD versions >= 3.3.
Warning
CIFS/SMBv1 is deprecated by Microsoft, Linux kernel, and Samba project. We strongly recommend updating servers to use at least SMBv2.1.
-
Publish AD Roaming Profile as Shared Folder: When OVD profiles are used with domain users, it is possible to have access to the roaming profile if it exists. This option is also available on Linux Application Servers.
-
Version of the Roaming Profile to publish: By default, Roaming profiles are managed by version. A suffix is added to user profile paths in order to distinguish the Windows version. Versions supported by Windows are:
- (no suffix): Windows Server 2008
- V2: Windows Server 2008 R2 and Windows Server 2012 R2 not updated
- V3: Windows Server 2012 R2 not updated
- V4: Windows Server 2012 R2
- V5: Windows 10 (1507 to 1511)
- V6: Windows 10 (1607 and later) and Windows Server 2016/2019/2022
-
Roaming Profile Shared Folder name: When the previous option is activated, it is possible to specify the name assigned to the directory used for the roaming profile.
-
Advanced support for specific Windows applications.
For each path listed in this setting, OVD will create a symbolic link in the user session on the local user profile of the Windows Application Server (APS) targeting the equivalent path on the OVD profile stored on the OVD File Server (OFS).
Warning: this setting has the potential to corrupt the user profile / user data so proceed with caution. Issues resulting from changing this setting should be resolved by removing any added path.
You might want to experiment using this setting when a specific Windows application works as expected during the first session but either the setup or the user data is not persistent accross the following sessions. These applications usually require access to a path on the local user profile but the OVD profile management will be storing this data remotely on the OFS.
Examples of situations where you may want to use this setting:
- The application runs with a different user account than the session user.
- When publishing Windows console or service type applications.
By default, this setting includes the
AppData\Local\Appspath. This allows Microsoft ClickOnce applications to be persistent in the OVD sessions when using the Microsoft Hybrid integration mode.
Remote Desktop Settings
- Enable Remote Desktop: The default setting, yes, allows the Desktop mode to be used with the OWA, EDC and EMC clients. If disabled and the user attempts to start a desktop session, a notification message will be shown to users. (You are not authorized to launch a session. Please contact your administrator for more information).
- Show icons on user desktop: Applications icon shortcuts are published on the user's virtual desktop by default.
- Allow external applications in Desktop: When starting a desktop session, if not all published applications can be run on the same server (for instance: Linux + Windows), this setting defines if the session will include external applications in the desktop or not. When disabled, the resulting action also depends on the "User can launch a session even if some of his published applications are not available" parameter to determine whether or not to allow the session to run.
- Desktop type: The desktop type can be selected to be Windows, Linux or Any (the default). If the default is set, then the desktop type selected will depend on the load-balancing algorithm in use for the application servers.
- Servers which are allowed to start desktop: Specifies the set of servers that can be dedicated to provide desktops for users. If no servers are specified, then the first server available for providing a desktop will be used. Enter the display name or the Internal Name (FQDN) of the servers that are allocated to provide desktop sessions. This information is found in the Configuration section for the server and can be displayed by clicking the Servers main tab and then selecting the individual server.
-
Authorize to launch a desktop session without desktop process: Internal use only, do not modify.
-
Use Icons from Application Servers: defines whether the application icons in the desktop session will reflect the icons from the Desktop Application Server or from the Session Manager.
When Enabled, use the application icons from the Application Server (i.e. the ones visible to the Administrator when they log in to the server).
When Disabled, use the application icons set by the Session Manager (i.e. the ones seen in the Admin Console). This is useful when there are custom icons set by the Admin or when certain icons are not able to be extracted by OVD.
This parameter only affects detected applications and not static applications.
Background Customization
- Choose a color: Determine the color used to fill the session background inside a session. This color can be associated with the background image.
- Choose a picture: Determine the image defined as wallpaper inside the session. If the image does not entirely cover the background, the color will cover the rest.
-
Choose a fit: Define how the image is placed on the background. Supported values are:
- center: Centers the image on display without resizing it. If the image is larger than the display then it is cropped.
- tile: Fills the display with the tiled image.
- stretch: Stretches or shrinks the image to the exact height and width of the display without preserving the aspect ratio.
- scale: Enlarges or shrinks the image to fill the display while preserving the aspect ratio.
- zoom: Resizes the image to fill the display while the preserving aspect ratio. If the image does not match the aspect ratio then it is cropped.
Remote Application Settings
- Enable Remote Applications: When enabled, allows the user to start a session in Application/Portal mode. If disabled and a session is started in Application/Portal mode, then a notification message is shown to users. (You are not authorized to launch a session. Please contact your administrator for more information).
- Enable access to the File Server data folders from the Web Access component: The default, yes, allows the Ajaxplorer component provided by the OVD Web Access server to use credential sent using the WebDAV protocol to access the data stored on the OVD File Server. If this option is disabled, the Ajaxplorer component will be disabled as it cannot access files on the File Server.
Resource restrictions for Linux Application Servers
-
CPU Priority: Relative priority of CPU time available to a session. For example, two sessions that have priority set to normal will receive equal CPU time, but a session that has priority set to high will receive 2 times more CPU time.
In the API, these values are represented by numeric value:
- 100: Low
- 256: Below normal
- 512: Normal
- 768: Above normal
- 1024: High
-
CPU Allocation: Limit of CPU time that a session can not exceed.
Takes a value which represents how much CPU time the session will get at a maximum, relative to the total CPU time available on one CPU.
Use values > 100 for allocating CPU time across more than one CPU.
-
Memory Allocation (RAM): Sets the maximum amount of user memory (including file cache).
If no units are specified, the value is interpreted as bytes. However, it is possible to use suffixes to represent larger units: k or K for kilobytes, m or M for megabytes, and g or G for gigabytes.
-
Memory Allocation (RAM and Swap): Sets the maximum amount for the sum of memory and swap usage.
If no units are specified, the value is interpreted as bytes. However, it is possible to use suffixes to represent larger units: k or K for kilobytes, m or M for megabytes, and g or G for gigabytes.
Ex: setting memory = 2G and memory+swap = 4G will allow a session to allocate 2 GB of memory and, once exhausted, allocate another 2 GB of swap only.
The RAM and Swap parameter represents the sum of memory and swap.
Processes in a cgroup that does not have the RAM and Swap parameter set can potentially use up all the available swap (after exhausting the set memory limitation) and trigger an Out Of Memory situation caused by the lack of available swap.
-
Per Session Process Isolation: Ensure that a user will not be able to list the processes of other sessions.
This option must be set in order to make visible memory restrictions defined for a session.
This isolation is only compatible with Ubuntu servers.
-
Advanced systemd configuration: Linux restrictions are based on systemd resource control.
The Administration Console does not offer all restrictions available with systemd.
This field makes it possible to declare additional systemd rules used in the user slice file (cf manpage of systemd.resource-control). For example, you can specify the following rule:
Warning
Limits defined in the Session Manager do not override limits created in the
systemd configuration directory /usr/lib/systemd/system/user-.slice.d/.
For example, in Ubuntu 22.04 LTS (Jammy Jellyfish) a default value of
TaskMax is set to 33%.
Warning
Per Session Process Isolation is only available for Ubuntu servers and RHEL8+ servers. Using it with RHEL7 will prevent session start. Ubuntu Xenial requires extra configuration if you wish to use audio redirection Configure pulseaudio to use Per Session Process Isolation on Ubuntu 16.04 LTS (Xenial Xerus)
Enabling this setting prevents Snap applications to run on Ubuntu 22.04 LTS (Jammy Jellyfish), disable Per Session Process Isolation if using Snap applications.
Warning
Before Ubuntu 22.04 LTS (Jammy Jellyfish), Memory Allocation (RAM and Swap) requires modification of the GRUB configuration Add support to swap limit for linux APS
Resource restrictions for Windows Application Servers
-
CPU Priority: Relative priority of CPU time available to a session.
For example, two sessions that have priority set to normal will receive equal CPU time, but a session that has priority set to high will receive 2 times more CPU time.
-
CPU Allocation: Limit of CPU time that a session can not exceed.
Takes a percentage which represents how much CPU time the session will get at a maximum. This value is between 1 and 100%.
-
Memory Allocation (RAM): Sets the maximum amount of user memory
If no units are specified, the value is interpreted as bytes. However, it is possible to use suffixes to represent larger units: k or K for kilobytes, m or M for megabytes, and g or G for gigabytes.
Warning
For all versions of Windows Server, CPU Priority is only available if the GPO Turn off Fair Share CPU Scheduling(DFSS) is activated.
Warning
On Windows Server 2012 R2, CPU Allocation is only available if the GPO Turn off Fair Share CPU Scheduling(DFSS) is activated.
Login Scripts
Note
This tab is not available when the administrator has both enabled Multi Tenancy and is in the global view. To regain access to this tab, the administrator must select a tenant.
A login script is a script that will be executed at user login on each Application Server involved in serving an application for a user. The login script tab lists existing login scripts and provides an interface to create a new script. An existing script may be deleted or modified.
The script can be created using various scripting languages on Windows and Linux such as:
- Bash (Linux only)
- Python
- Vbs (Visual Basic, Windows only)
- Batch (Windows only)
- Powershell (Windows only)
It is possible to edit the scripts with the embedded WYSIWYG editor or by importing an existing script.
Once a script has been created it must be assigned to one or more user groups for it to become active. Once active, the script will be executed on the assigned Application Servers when a user in the selected user group performs a login.
Publications
Note
This tab is not available when the administrator has both enabled Multi Tenancy and is in the global view. To regain access to this tab, the administrator must select a tenant.
At least one application group must be published to at least one user group for users to be able to access the OVD farm. Server publications are optional.
The main tab displays a list of the available application and server publications and the ability to create a new application or server publication. Existing publications may be deleted.
Publication Wizard
Note
This tab is not available when the administrator has both enabled Multi Tenancy and is in the global view. To regain access to this tab, the administrator must select a tenant.
The publication wizard provides an easy-to-use way to create new application publications.
Status & Reports
The Status & Report tab holds status and report related OVD settings.
Active Sessions
All active user sessions can be viewed here, along with their current status (ex: logged, disconnected, etc...) and support functions to end or disconnect sessions.
Clicking on individual sessions will display:
- Information: general information about the session, such as user name, session mode, start date, and status.
- Servers: A list of all the servers currently being used to serve the user session.
- Running applications: A list of any currently running applications in the session.
- Published applications: A list of applications currently available to use in the session.
- Storage: Any types of storages being used to store the user's data, including user profiles and external data storages.
- Force Log Off: An option that allows the administrator to immediately end the session (ex: if the system is being put into maintenance and all running sessions must be closed).
- Disconnect this session: An option that allows the administrator to disconnect the user's session (the user will still be able to start the session up again and recover it in the same state it was in when disconnected).
Session Shadowing
In order to facilitate session troubleshooting, OVD provides a Session Shadowing option that allows administrators to view and manipulate a user's session in live time.
Prerequisites
Session Shadowing can be enabled through the OVD Administration Console. The following steps are required in order to use this feature:
-
Go to System → System Settings and set "Enable Shadowing support" to
yes. -
For Windows desktop sessions:
-
Install Microsoft Remote Assistance (MSRA) on the Windows OVD Application Server that serves the user desktop.
-
Install Microsoft Remote Assistance (MSRA) on the client machine the administrator will be using to start shadowing sessions. Windows sessions can only be shadowed using Windows clients.
-
-
For Linux desktop sessions:
- Install any VNC client on the administrator's workstation (any OS).
-
Ensure the network between the administrator's workstation and the Linux Application Server is configured to allow VNC communication (ex: network routing, firewall, etc...).
Please refer to the "Initiate shadowing from within an OVD session" note below to skip this requirement.
Initiate shadowing from within an OVD session
As a convenience, the administrator may prefer to start shadowing within an OVD session. This shortcut will allow the administrator to skip having to configure their workstation and/or change the OVD farm's network configuration.
In order to use OVD as the shadowing workstation:
- Install a VNC client application on either a Windows or Linux Application Server.
- Publish the VNC client and MSRA and a web browser in OVD to a specific group restricted to administrators.
- Start an OVD session with access to these restricted applications.
- Open the web browser, navigate to the Administration Console.
- Initiate the shadowing session.
Starting a shadowing session
Once Session Shadowing has been enabled as described above:
-
Communicate with the user about providing support via shadowing and request they start a desktop session.
-
Click on the running session (listed on Sessions → Active Sessions) and look at the list of Servers. The server that is currently serving the session desktop will have a shadowing option next to it. Click this.
-
A popup will appear describing the info that will be used to start the shadowing. Click Open VNC Client and save the VNC file that is generated.
-
Open this file to start your VNC client with the appropriate connection information.
- For MSRA, the OAC popup will also list a password. Use this when prompted by the MSRA client.
-
The user will be prompted in their session to accept the incoming shadowing connection. When they click Yes to accept, the shadowing session will begin.
With the connection complete, the administrator can now view the user's session in live time and control their environment using their own mouse and keyboard and both user and administrator can view each others' actions on the same desktop.
To end the shadowing session, close the VNC client. The user will be able to continue using their session with no disruptions.
General Reporting
The general reporting page presents a number of different sets of output for a user-selected period of time. The following information is available for the period selected for the system as a whole:
- Number of launched sessions.
- Number of active sessions.
- Session distribution by server.
- Session end status distribution.
The following information is available for each server:
- Number of launched sessions for each server.
- Session end status distribution.
- CPU usage.
- Memory usage.
Logs
Log information from all the OVD servers. Only a partial log (the latest) is displayed on this page. It is possible to show all log information by clicking the magnifying glass or save log files by clicking the disk icon.
Linux Log Location
All Linux based OVD logs are stored in the /var/log/ovd directory.
Each server has logs based on that server's installed role(s).
-
The slaveserver log located at
/var/log/ovd/slaveserver, includes all log data from any Linux application servers and the Secure Gateway servers. -
The API log, located at
/var/log/ovd/session-manager/api.log, contains logs specific to OVD's internal API. It stores logs related to OVD's core functionality. -
The main log, located at
/var/log/ovd/session-manager/main.log.
Windows
Windows based OVD logs are stored in the C:\ProgramData\OVD\slaveserver\log directory.
The log in this directory is the slaveserver log, which includes logs from the Windows
application server.
Windows based OVD logs are also accessible using the Windows Event Viewer.
Log Format
The logs are all formatted as follows:
<time stamp> [TAG] : [PID] messageThe TAG denotes the severity of the message.
-
DEBUG is mostly for development and debugging purposes.
-
INFO is a tag for something that is not an issue, but worth knowing.
-
WARNING means something should be addressed but is not currently breaking anything.
-
ERROR means OVD has encountered something wrong / not as expected.
-
CRITICAL is an error of such severity that the server can not function properly.
Timezone
The log lines are always prefixed by a date and time to indicate when the log message occurred.
This date and time information is displayed in local time. The local time translation is not using the same configuration for all roles.
For the Session Manager, the information must be configured in the
date.timezone in the PHP ini.
For the Application Server, File Server, and Enterprise Secure Gateway, the date and time are resolved according to the Operating System defined timezone.
For the sake of consistency and clarity, please ensure all your servers are correctly configured to use the same timezone.
Temporary activate debug logs
For troubleshooting purposes, it can be convenient to increase log verbosity without restarting the service so it does not impact the running sessions and the administrator can retrieve more information on the current state of the service.
OVD version requirement
This functionality is only available in OVD version 3.2+.
-
Add the "debug" level in the configuration (file or registry)
-
Reload the service
-
Linux
-
Windows
-
When troubleshooting is done, revert the configuration and reload the service in the same way.
Administration Actions Log
All administrator actions are logged in order to provide an audit trail of changes.
Session History
Displays a list of the currently running user sessions. Selecting a session displays further details for that session. The information displayed here is a subset of the Session Details described below.
The possible Session states are:
- Logged: indicates that a user is connected to the session
- Ready: indicates that a user session is starting. If the user session stays in the ready state for some time, the session might be stalled and investigation is required to confirm the problem.
- Disconnected: indicates that the user has been disconnected from the virtual session that is still running on the server. The user may reconnect to the session and continue where he left off if the follow me session setting is enabled.
- Destroyed: indicates that the session has been deleted
- Destroying: indicates that the session is closing. If user profiles are enabled, user data will be saved to the FS server
Session Details
- The Information section displays the following information:
- User: displays the OVD user ID.
- Mode: The session mode, either Desktop or Application.
- Start date for this session.
- Status of the user session.
-
The Servers section displays the following information:
-
Application Server: lists all applications servers used to host the user session. Also indicates which Application Server is acting as the Desktop server. Resources used by the session are displayed. Values monitored are:
- CPU usage: CPU usage of the session per server
- Memory usage: The memory usage per server regarding the restriction configured (if it exists)
- Memory usage (peak): the maximum amount of memory used in the session
-
File Server: if user profiles are enabled, displays the OFS server hosting the user profile. If shared folders are enabled, any shared folders available to the user will be listed.
- The list of currently running applications within the OVD session.
- The list of published applications available for the user.
- The Storage section displays information about related storage units for the user profile, shared folders and external data provided by an external data storage system.
- Force Log Off: Forces the session to end.
- Disconnect this session: Forces the disconnection of the user session.
-
Application Licensing
The Licenses Currently Consumed report provides information about the current allocation of software licenses to users. This information can be filtered and exported to a CSV file.
Application Usage Reporting
The Application Usage report provides detailed information about each application that was executed on the OVD farm. The information can be filtered and exported to a CSV file.
Application Usage by User Group Reporting
The Application Usage by User Group report provides aggregate usage information for each application used on a user group basis. The information can be filtered and exported to a CSV file.
Messaging
The Messaging reporting provides reports of in-session messages sent to users. For further details, please refer to the Messaging Guide.
Administration Console configuration file
In addition to the OVD Session Manager settings, the OVD Administration Console has its own configuration that stores a few parameters for advanced administrators.
The configuration is stored in the
/etc/ovd/administration-console/config.inc.php file and uses the
PHP define format.
-
SESSIONMANAGER_HOST: the FQDN of the OVD Session Manager in your infrastructure. This is configured during the installation of OVD and should not be changed. -
SPOOL_DIR: this is used internally by OVD and should not be changed. -
EXPERT_MODE: display additional advanced menu items in the System tab. -
DEBUG_MODE: when enabled, this option will add a notification for every call made to the OVD Administration API. -
API_ENGINE: Defines which OVD Administration API engine the OAC should use to communicate with the Session Manager. Possible values arerest(default) andsoap.
OVD version restrictions
- The SOAP endpoint is not available after OVD versions 3.1.
- The parameter
API_ENGINEis only available for OVD version 3.1.
Appendix
Add support to swap limit for linux APS
This section explains how to configure grub in order to activate SWAP limitation on Linux Application Server Resource restrictions for Linux Application Servers. This change must be made on each Linux Application Server and it will require a reboot. The Server must be in Maintenance mode during the operation.
Ubuntu LTS
- Open the file
/etc/default/grub -
Add the following content at the end of the line GRUB_CMDLINE_LINUX_DEFAULT:
cgroup_enable=memory swapaccount=1 -
Close the file
-
Update the grub configuration:
-
Reboot the Server:
RHEL 7
-
Update the grub configuration:
-
Reboot the Server:
Disable DFSS support
Fair Share CPU Scheduling dynamically distributes processor time across all Remote Desktop Services sessions on the same RD Session Host server.
This is based on the number of sessions and the demand for processor time within each session.
To disable this support, open the local group policy:
Computer Configuration
  → Administrative Template
    → Windows Components
      → Remote Desktop Session Host
        → Connections
          → Turn off Fair Share CPU Scheduling
Set it to enable and reboot the server.
Configure Pulseaudio On Ubuntu 16.04 LTS (Xenial Xerus) (Per Session Process Isolation)
Pulseaudio 8.0, available for Ubuntu Xenial, is not compatible with the Per Session Process Isolation on Linux APS as it prevents audio usage. If audio is not required, the Remote audio playback and Remote audio recording settings can be disabled in the Administration console.
To continue using Remote audio, apply the following instructions on each Linux Application Server:
- Open the file
/etc/pulse/daemon.conf -
Add the following line to the end of the file:
-
Save and exit the file